Table of Contents
- 1 Types Of Wheelbarrows
- 2 Choose For Space And Need
- 3 Method: How to hang a Wheelbarrow on a Wall
- 4 Different Ways to Hang A Wheelbarrow On The Wall
- 4.1 Handmade Wooden Wheelbarrow Hanger with Two Ends
- 4.2 Wheelbarrow Holder On Wall With Storage Hook And Rail Design
- 4.3 Wheelbarrow Holder that Hangs on the Wall
- 4.4 Wheelbarrow Storage Bracket for Fence Lining
- 4.5 Wheelbarrow Pulley System Installed in the Ceiling
- 4.6 Natural Wheelbarrow Position: Upside-Down
- 4.7 Wheelbarrow Storage Bracket for Wall or Fence
- 5 Why is Proper Storage of Your Wheelbarrow Important?
- 6 Conclusion
Don’t let the idea of how to hang a wheelbarrow on the wall intimidate you—it’s actually quite manageable with a few straightforward tips and tricks.
This guide addresses common questions about the process, such as locating wall studs, choosing the right screws or anchors, and ensuring a secure attachment. Whether you’re a DIY enthusiast or a novice, read on for all the guidance you need to effortlessly hang a wheelbarrow on the wall!
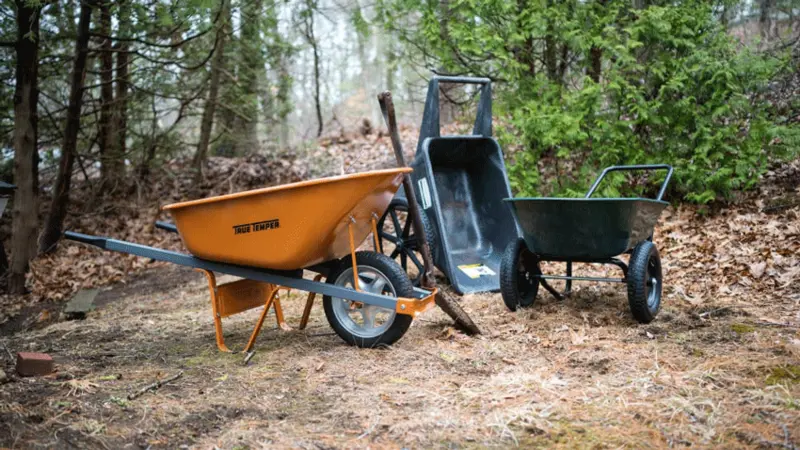
Types Of Wheelbarrows
It’s crucial to take your wheelbarrow’s type into account before hanging it on the wall. Hanging them will be a little different depending on whether your wheelbarrow is made of plastic or wood.
Choose For Space And Need
Selecting a location for your wheelbarrow’s hang is the first step. It is crucial to take into account the available area as well as the maximum weight that it can support with ease. It’s important to consider any possible obstacles in the space, including wall fixtures or furniture. For easy access, think about mounting your wheelbarrow vertically or horizontally.


Method: How to hang a Wheelbarrow on a Wall
Parts & Tools Required
To accomplish the task of hang a wheelbarrow on the wall correctly, some preparation is necessary. Before starting, make sure you have all the required instruments and supplies:
- Wall anchors;
- Wheelbarrow;
- Drill;
- Screws;
- Leveler
Step 1: The Frame Shelf
Installing a frame shelf is the first step in hanging a wheelbarrow on the wall. This piece of equipment gives your wheelbarrow more support and an anchor point.
Make sure you get a frame shelf that fits your wheelbarrow as they are available in different sizes at most hardware stores.
Step 2: Location of the Hanger
Finding the hanger’s location is the next step in hanging a wheelbarrow on the wall. Take into account elements like your ceiling height and how simple it would be to access your wheelbarrow to ensure that you hang it at the proper height.
Hanging your wheelbarrow close to other tools could also be useful so that everything is accessible when needed.

Step 3: The Main Beams
Your wall is now prepared, so let’s begin building the major beams. This is how your wheelbarrow rack will be put together. Eight-foot-long, four-by-four posts should serve as the two primary beams.
Use heavy-duty screws or lag bolts and fasten each post firmly to the wall studs. Check that they are level before proceeding.
Step 4: Rear Cross Beam
Secondly, you must confirm that the rear cross beam is fastened correctly. When the wheelbarrow is hung on the wall, this piece of hardware will help keep it in place. Measure and mark the location of the screws on the wall first.
Next, drill pilot holes in the designated spots to facilitate the easy insertion of the lag bolts that support the crossbeam. After drilling your pilot holes, insert two lag bolts into each hole with a socket wrench and tighten them with nuts and washers.
Lastly, use a wrench to tighten each lag bolt after attaching one end of the rear cross beam to it.
Step 5: Mounting the Frame
After preparing the wall, you may start mounting the frame. To begin, put two screws into the frame’s end studs on each side. Before proceeding, make sure they are level and securely fastened.
For added support when mounted, you might need to fasten a second board across the rear of your wheelbarrow if its handles have crossbars. If everything is level and stable, proceed, if necessary, with the manufacturer’s instructions and install four additional screws at uniform intervals throughout the frame’s length.
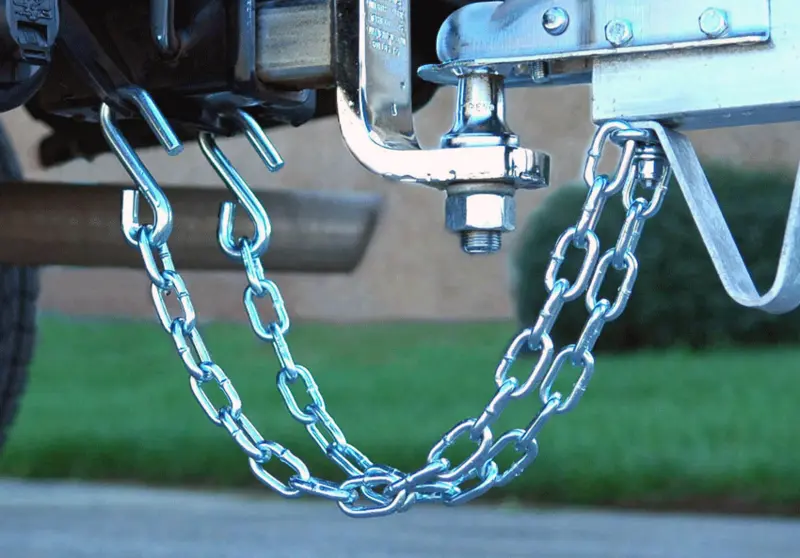
Step 6: Installing a Safety Chain
A safety chain should be added after the wheelbarrow is firmly mounted on the wall. This is to ensure that the wheelbarrow won’t topple over in the event that you bump against it or if the wall mount receives any unexpected shocks.
Installing a safety chain involves the following steps:
- A tight eyelet screw into the wall stud nearest to where you intend to hang your wheelbarrow should be fastened with one end of the chain secured to it. To avoid interfering with the stability of the mounting bracket, make sure the eyelet screw is positioned at least 4 inches away from it.
- Make sure that every eyelet screw is firmly put into its corresponding wall stud by feeding the other end of the chain through two more eyelet screws that are spaced about 10 inches apart.
- Using a wrench or a pair of pliers, fasten the opposite end of the chain to the two eyelet screws that were previously positioned.
- To make sure the safety chain is sturdy and won’t break apart easily under pressure, test it by gently tugging on it.
Step 7: Operation
Now that your wheelbarrow is firmly in place, it’s critical to inspect it for wear or damage. Check to see if the mounting bolts are still tight, and tighten them again if needed.
Check the wheelbarrow for any rust or corrosion, and treat any affected parts as soon as you find them by applying an appropriate rust inhibitor. Lastly, to keep any moving elements like wheels or axles operating correctly, make sure to grease them frequently.
You can make sure your wheelbarrow lasts for many years and stays in good shape by doing these easy maintenance tasks.
Different Ways to Hang A Wheelbarrow On The Wall
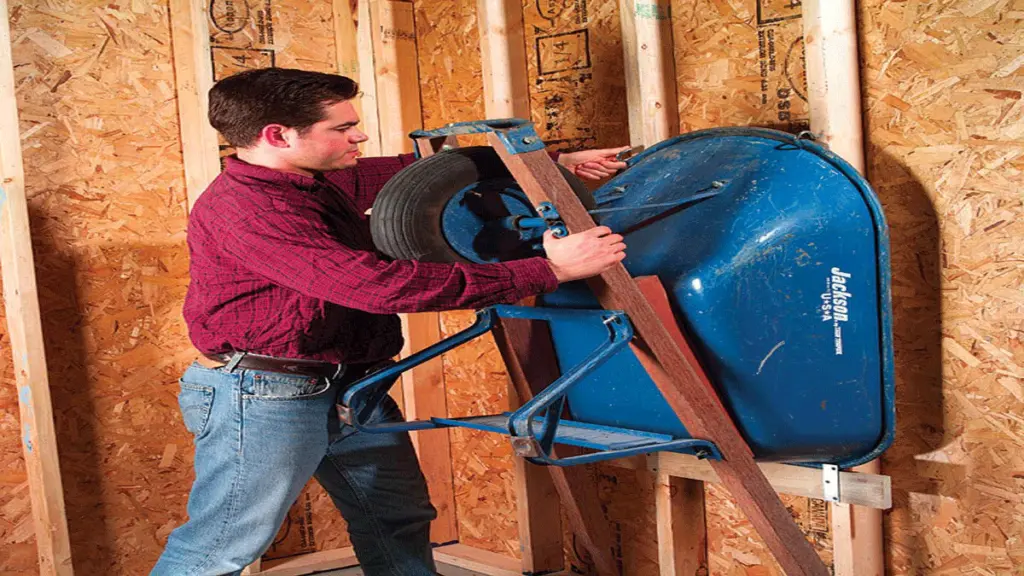
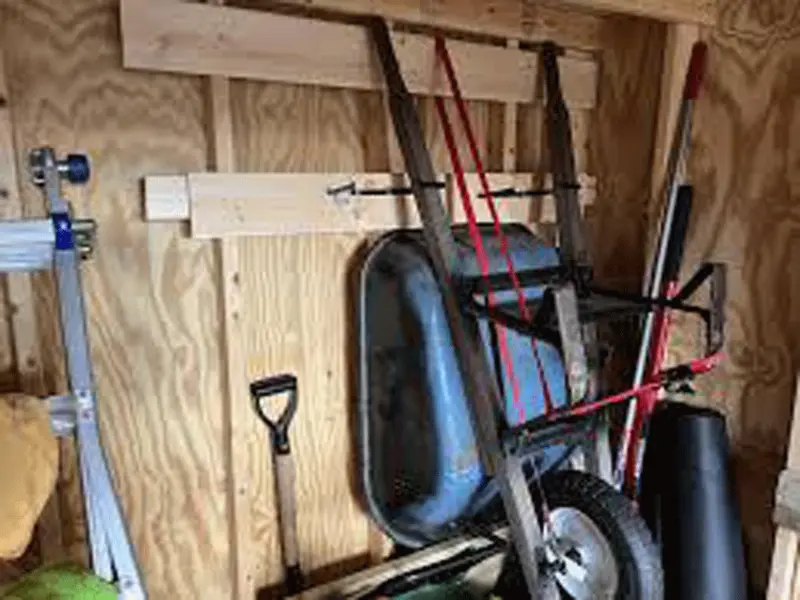
Handmade Wooden Wheelbarrow Hanger with Two Ends
This one is for you if you’re handy with do-it-yourself projects. Two angled pieces of wood are affixed to the wall to create this hanger.
It makes a framework that resembles a cradle, so you can hang your wheelbarrow against the wall. As long as the installation is done correctly and firmly using the right screws or bolts, this is a safe and simple choice.
Wheelbarrow Holder On Wall With Storage Hook And Rail Design
This can be the best choice for you if you’re searching for something more practical. The rail and hook system on this holder is adjustable.
It can be mounted on the wall or even the ceiling, depending on where in your house there is adequate space. It’s a fantastic option if you don’t have the time or energy to dedicate to DIY projects because it’s simple to install and adjust.
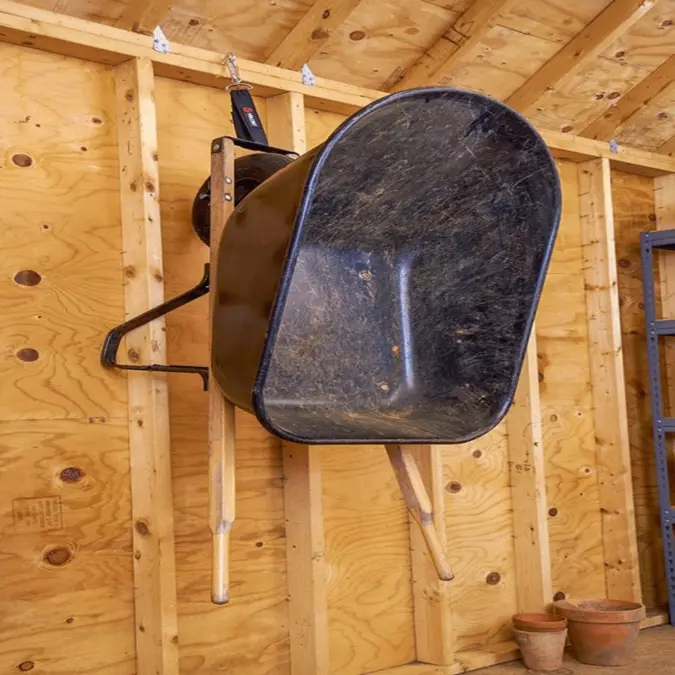
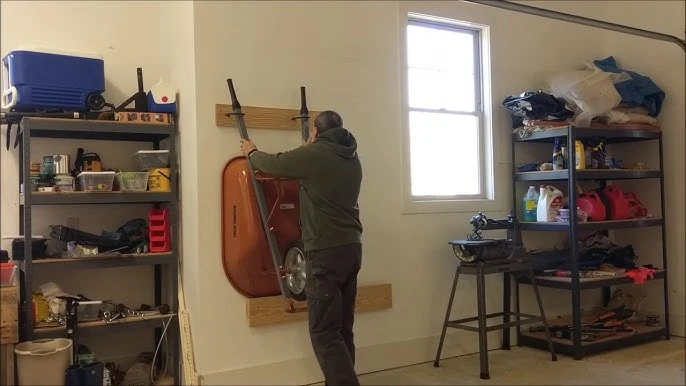
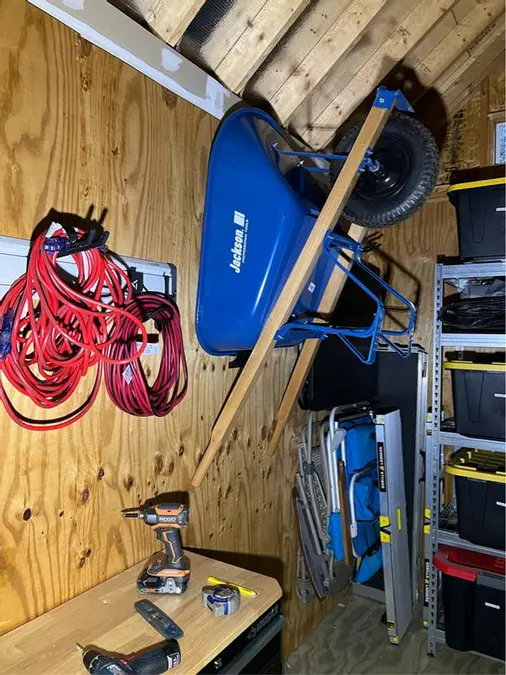
Wheelbarrow Holder that Hangs on the Wall
Those who are short on space or require a fast setup will find this wall-hanging holder ideal. It includes adjustable arms and a basic mounting bracket so you can hang your wheelbarrow against the wall.
There is no complicated hardware or equipment needed for this setup, making it a simple solution to keep your wheelbarrow off the ground without taking up much room.
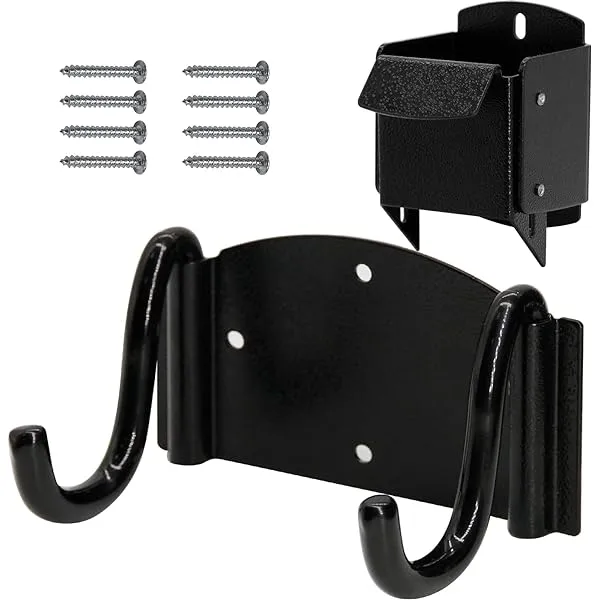
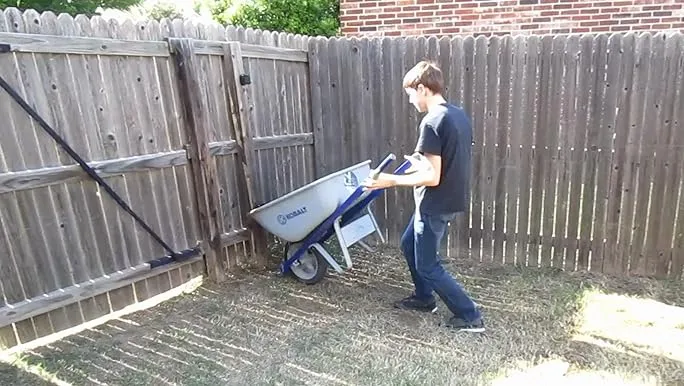
Wheelbarrow Storage Bracket for Fence Lining
This is the ideal wheelbarrow storage solution if you have a wall or fence outdoors. All it takes to mount this bracket to the wall are two screws. After installation, it offers a safe and convenient solution to suspend your wheelbarrow, so you won’t have to worry about the wind taking it away.
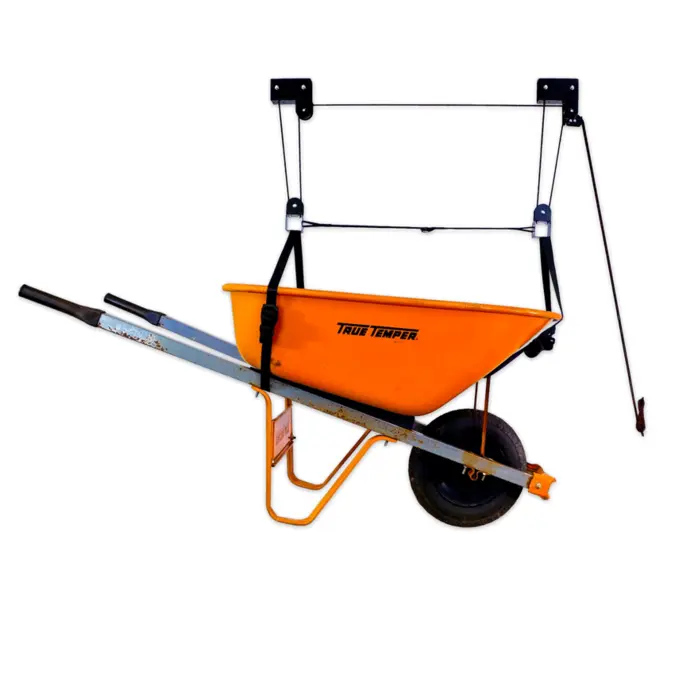
Wheelbarrow Pulley System Installed in the Ceiling
This is the best option if you wish to keep your wheelbarrow off the ground. Two movable hooks on either side of the wheelbarrow and a pulley fixed to the ceiling are used in this arrangement. Your wheelbarrow may be raised and lowered with ease and without the need for any additional tools or equipment.

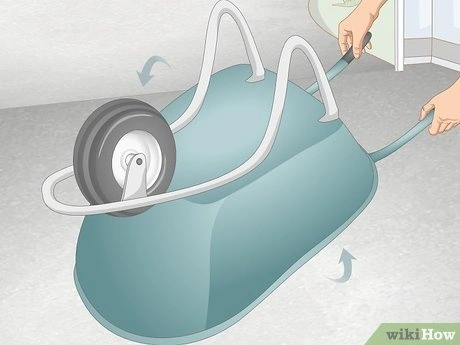
Natural Wheelbarrow Position: Upside-Down
This is arguably the easiest and most popular method for hanging a wheelbarrow on a wall. To hold the wheelbarrow upright, just flip it over and fasten it to the wall with a sturdy hook or bracket.
This is a good alternative for people who want a safe place to store their wheelbarrows but don’t want to take on difficult do-it-yourself projects.
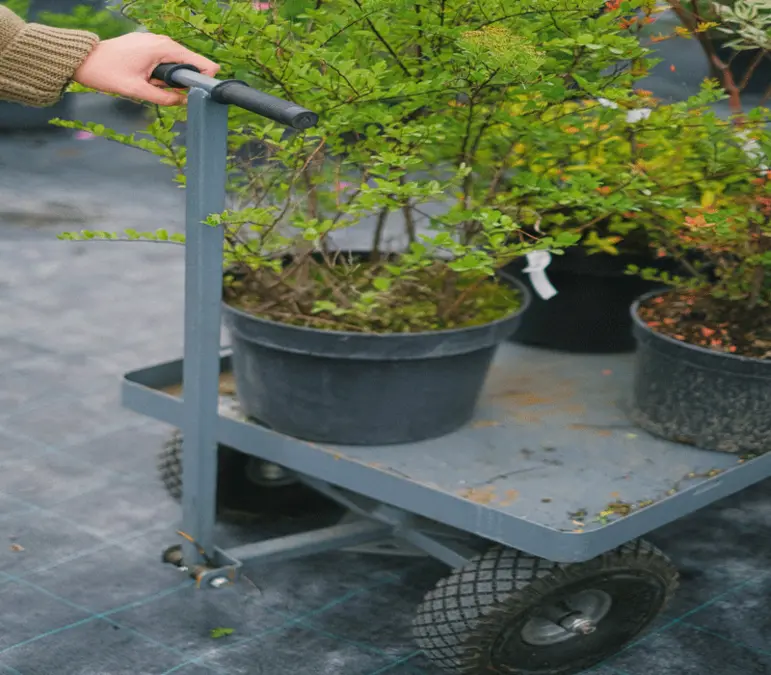
Wheelbarrow Storage Bracket for Wall or Fence
With this wall or fence-mounted bracket, your wheelbarrow will remain above the ground. With its movable arms that you can mount to a wall or fence, it’s the perfect choice if you want to make sure your wheelbarrow stays in place when not in use.
Whatever approach you choose, before you fill it with anything heavy, make sure it’s safe and secure.
Why is Proper Storage of Your Wheelbarrow Important?
For Safety Purposes
Wheelbarrow storage needs to be done correctly for a number of reasons. It does this first to keep the wheelbarrow from toppling over and hurting family members or anybody else in the vicinity.
The area can be kept tidy and orderly by keeping the wheelbarrow out of the way of paths and open spaces. Lastly, storing your wheelbarrow properly can help prevent weather-related deterioration of the frame and wheels, which will extend its lifespan.

To Increase Its Longevity
Proper storage of your wheelbarrow will also prolong its useful life. Rust may be avoided, and damage to the frame and wheels can be avoided by storing them in a cool, dry location out of the sun and the elements.
It will also last longer and be easier for you to move around when needed if you take extra precautions to protect the wheelbarrow while not in use.

Easy Access And Tidiness
Lastly, keeping a wheelbarrow neat and easy to access can be ensured by storing it appropriately. Wheelbarrows are an excellent option for busy homeowners who frequently need to move goods around their houses.
Because they are easy to access and can be hung on the wall. It also keeps the area neat and orderly by hanging the wheelbarrow above the ground.
Managing Your Space
Apart from the aforementioned advantages, storing your wheelbarrow correctly will also aid in space management. Using vertical storage options such as wall hooks or hangers allows you to maximize space utilization without compromising neatness or safety.

Conclusion
Hanging a wheelbarrow on the wall is a great way to keep it out of the way and make your garage or shed look neater. It can also help you save space in small workshops.
Make sure to always use high-quality brackets, screws, and anchors when mounting anything to the wall. If you are unsure about the weight capacity of your wall, consult with a professional before proceeding with the installation.
With careful planning and an understanding of how to hang a wheelbarrow on the wall safely, this task should be relatively simple to do!
We hope this guide has been helpful in teaching you how to hang a wheelbarrow on the wall!
Good luck
great article
Outstanding feature
great article
great article
Precisely what I was searching for, appreciate it for putting up.